
Schools use UDISE Plus to maintain and submit important information about school facilities, student enrolment, teachers, and other education-related details.
However, login failures, incorrect records, validation problems, and submission errors can make the process difficult, especially when reporting deadlines are close.
Understanding UDISE plus common errors and solutions helps school staff identify the cause of a problem, correct it safely, and avoid repeating the same mistake. This guide explains common technical issues, practical troubleshooting steps, and ways to get official help when a problem cannot be resolved at the school level.
What Is UDISE Plus, and Why Do Errors Occur?
UDISE Plus stands for the Unified District Information System for Education Plus. It is India’s school education information system, managed under the Department of School Education and Literacy, Ministry of Education, Government of India.
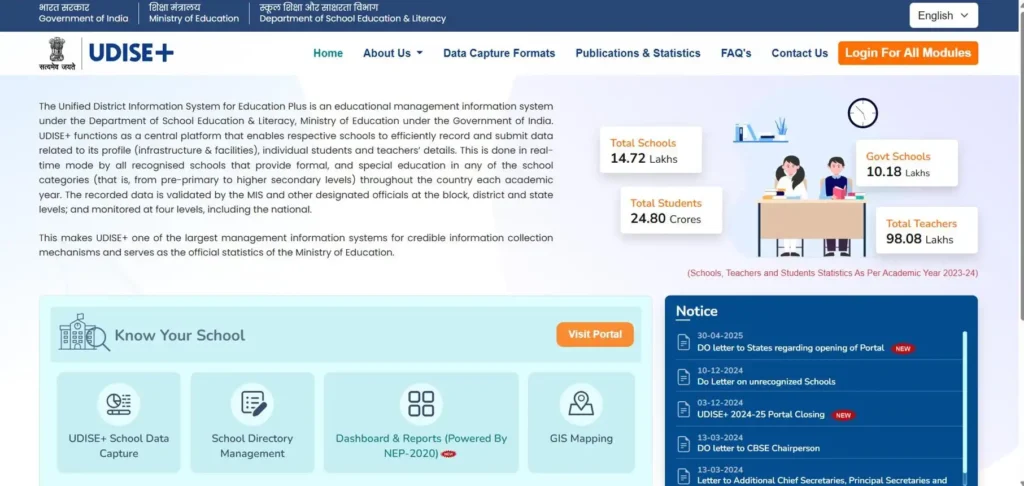
The platform collects information about schools, students, teachers, infrastructure, and other areas that help education authorities understand the condition of school education across the country. The official portal reported approximately 14.67 lakh schools, 24.72 crore students, and 1.02 crore teachers for academic year 2025–26 on its statistics display.
Official portal: UDISE Plus
UDISE Plus is more than a website where schools fill in forms. The information submitted through the system supports education planning, reporting, monitoring, and policy decisions. For this reason, even a small error in a school record may require correction before the relevant data can be accepted.
Why do schools face UDISE Plus problems?
Most problems fall into five main categories:
- Login and account issues: Incorrect passwords, CAPTCHA failures, expired sessions, or outdated account details.
- Technical issues: Slow internet, server downtime, browser problems, or temporary website errors.
- Data-entry mistakes: Missing information, incorrect formats, or values that do not match the records held by the school.
- Validation and submission problems: The system identifies incomplete sections, inconsistent figures, or other conditions that prevent submission.
- Administrative restrictions: The relevant reporting module may not be open, a school account may lack permission, or a correction may require approval from an authorised official.
The first step is to identify which category applies to the problem. Repeatedly clicking the Submit button or changing unrelated information is unlikely to solve the underlying issue.
1. UDISE Plus Login Failed: How to Fix Username and Password Problems
Login problems are among the first issues school staff may encounter. A user may enter the wrong password, use an outdated login page, or try to access a module that requires different credentials or permissions.
Common causes of login failure
Check these possibilities before trying again:
- The username or password contains a typing error.
- Caps Lock is enabled, or an extra space has been entered.
- The CAPTCHA has been entered incorrectly.
- The password has changed or expired under the applicable account rules.
- The school is using an outdated or incorrect portal address.
- The account’s registered mobile number or other details need updating.
- The account is not authorised to access the selected module.
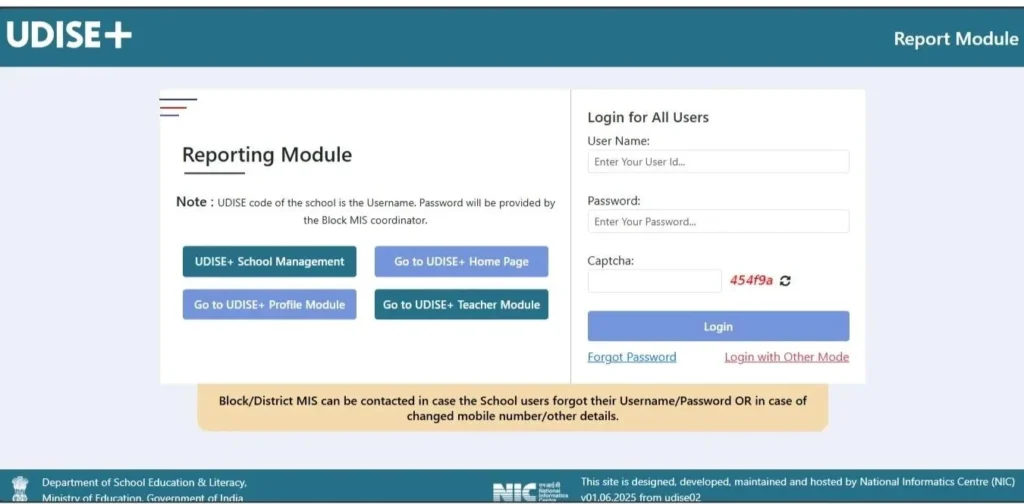
The correct login process can depend on the module and the user’s role. For example, the official reporting module states that the school UDISE code is used as the username and that the password is provided by the Block MIS coordinator. The same page advises school users to contact Block or District MIS when they have forgotten their credentials or need to update account details.
Step-by-step solution
- Open the relevant service from the official UDISE Plus website.
- Confirm that you are using the correct login page for your school and module.
- Enter the username carefully, checking the school code or other required identifier.
- Type the password manually if copying and pasting introduces unwanted spaces.
- Refresh the CAPTCHA and enter the new characters exactly as displayed.
- If a password-reset option is available, follow the instructions on the official page.
- If access still fails, contact the authorised Block or District MIS coordinator.
Example: A school operator enters the school’s UDISE code and a password saved in an old notebook. The system rejects the login several times. Instead of repeatedly guessing passwords, the operator checks the username, confirms the correct portal, and requests a credential reset through the authorised channel.
Important: Never share passwords, OTPs, or other login secrets with an unauthorised person. Avoid third-party websites that promise instant account recovery.
2. UDISE Plus Session Expired: How to Prevent Losing Work
A udise plus session expired message generally means that the login session is no longer valid. This can happen after a period of inactivity, when a user signs in again in another tab, or when the system requires the user to authenticate again.
The official UDISE Plus sign-in page has displayed a message indicating that the login page expired because of inactivity. This confirms that session expiry is a real possibility, although the exact timeout may vary by service.
How to fix a session-expired error
- Return to the official login page and sign in again.
- If you are working in multiple tabs, close the extra tabs and use one active session.
- Avoid leaving a form open for long periods without saving.
- Prepare figures and supporting records before beginning a lengthy data-entry task.
- Save or submit individual sections whenever the module provides a clear save option.
- If the same error occurs immediately after login, try a fresh browser session and check whether the official portal is experiencing a technical problem.
Do not assume that information entered before the session expired was saved successfully. Some forms may preserve previously saved entries, while unsaved changes may be lost.
Practical example: A school employee spends 40 minutes entering infrastructure details and then leaves the computer unattended. On returning, the employee finds that the session has expired. The safest response is to sign in again, inspect the saved section, and verify which fields need to be completed again.
The key lesson is simple: verify saved data before re-entering it. This prevents duplicate work and reduces the risk of overwriting correct information.
3. UDISE Plus Server Down or Slow Loading
A UDISE plus server down problem can prevent users from opening the portal, logging in, loading a form, or submitting information. In other cases, the page may open but take unusually long to respond. This is often described as UDISE plus slow loading.
Possible causes include heavy traffic, temporary server maintenance, an unstable internet connection, browser problems, or a failure in a specific portal service. A slow page does not automatically mean that the entire UDISE Plus system is unavailable.
How to identify the cause
Use the following checks to distinguish a local connection issue from a portal-side problem.
What you notice | Possible cause | What to do |
The website does not open on any device | Portal outage or network issue | Check connectivity and the official portal again |
The website opens on a phone but not on the school computer | Browser, device, or network settings | Test another supported browser or device |
Login works, but one module does not load | Module-specific problem or access restriction | Recheck the module link and account permissions |
Pages load slowly during a busy reporting period | Heavy traffic or unstable connection | Wait briefly and retry |
The page loads but the Submit button does not respond | Browser script, validation, or server issue | Check required fields and retry carefully |
Steps to fix server and loading problems
Step 1: Check the internet connection. Open another trusted website to see whether the connection is working normally. If several sites fail, investigate the local network first.
Step 2: Reopen the official portal. Type the official address directly rather than following an unfamiliar link. The UDISE Plus homepage is a useful starting point.
Step 3: Wait before retrying. If the page appears temporarily unavailable, wait a few minutes and try again. Avoid repeatedly refreshing a form containing unsaved information.
Step 4: Test the browser. Open the portal in another supported browser or a fresh private window. If it works there, cached files, cookies, or an extension may be affecting the original session.
Step 5: Check official notices. The portal may publish reporting announcements, changes to the data-entry period, or other notices. Do not rely on an old social media post to determine whether a module is currently open.
Example: A school operator finds that the login page opens quickly in the morning but becomes slow late in the afternoon. Other websites work normally. The operator saves completed sections, waits for the portal to respond, and tries again later rather than submitting the same form repeatedly.
There is no single confirmed response time that applies to every UDISE Plus module. If the problem continues across devices and networks, record the time, affected page, and error message, then report the issue through the appropriate official support channel.
4. UDISE Plus Data Not Saving: How to Recover Unsaved Information
A UDISE plus data not saving problem is especially frustrating because a user may complete a form without receiving a clear confirmation that the information has been stored.
The cause may be an incomplete required field, a failed network request, an expired session, a validation message outside the visible part of the page, or a temporary server problem.
Common signs that data has not been saved
- The Save button appears to respond, but the page does not confirm success.
- Previously entered values disappear after reopening the section.
- A section still appears incomplete in the dashboard.
- The page displays an error after the Save button is clicked.
- The form reloads and shows older values instead of the latest changes.
Step-by-step troubleshooting
- Check for a confirmation message. Look for a success notice, updated status, or other indication that the portal accepted the save request.
- Inspect the entire form. Look for required fields, highlighted errors, or messages near the bottom of the page.
- Save smaller sections. If the module permits it, complete and save one section at a time instead of entering everything in a single long session.
- Reopen the section. Navigate away only when safe, return to the section, and confirm that the saved values remain present.
- Check the session. If the session expired during the process, sign in again and inspect the existing record.
- Avoid duplicate submissions. If a request seems stuck, verify the current status before clicking Save or Submit again.
- Escalate persistent failures. If the information repeatedly disappears, capture the exact error message and contact the authorised support channel.
Example: A school enters the number of classrooms and toilets in its infrastructure section. After saving, the page returns to the dashboard. The operator should reopen the infrastructure section and check whether both figures remain present. If they have reverted to their earlier values, the save was not confirmed and the entries need to be checked again.
How to reduce the risk of losing data
- Keep the source records available while entering information.
- Prepare calculations and totals before opening the online form.
- Avoid refreshing the page while a save request is processing.
- Use only the save or draft options actually provided by the module.
- Maintain a secure working record of figures already verified by the school.
Do not keep sensitive student or staff information in an unsecured spreadsheet simply for convenience. Use approved school storage practices, limit access to authorised staff, and follow the applicable data-protection rules.
5. UDISE Plus Validation Error: Understanding Required Fields and Incorrect Formats
A UDISE plus validation error occurs when the system identifies information that does not meet the rules for a particular field or section. The problem may involve a missing value, an invalid number, an incorrect date, or a combination of figures that does not satisfy the form’s requirements.
Validation is intended to improve data quality. It can prevent incomplete or inconsistent information from moving to the next stage of the reporting process.
Common validation mistakes
Error type | Example | Recommended fix |
Required field missing | A compulsory field is blank | Enter the verified information or follow the official instructions for unavailable values |
Incorrect number format | Text entered in a number-only field | Enter the value in the required format |
Invalid date | A date is entered in an unsupported format | Follow the date format displayed by the form |
Out-of-range value | A count falls outside the accepted range | Check the original school record and the field instructions |
Inconsistent totals | The total differs from the sum of its parts | Recalculate the figures and correct the underlying entries |
Conditional field incomplete | An additional field is required after selecting a particular option | Complete the newly required field |
These are common examples of online form validation; the exact rules depend on the active UDISE Plus module and academic year.
How to correct a validation error
First, read the full message. An error may identify the field directly, or it may refer to a related value elsewhere in the form.
Second, check the original record. Do not change a figure merely to make the validation message disappear. Verify the value against the school’s admission register, staff records, infrastructure records, or other relevant source.
Third, check related fields. If the total number of students does not match the sum of the category totals, review all contributing figures before changing the total.
Fourth, save and validate again. Once the correct information has been entered, use the available save or validation function and confirm that the error has cleared.
Example: A school records 120 students in one section and 115 in another, but the displayed total is 245. The figures add up to 235, not 245. The operator must check the original records to find the incorrect entry rather than changing one of the numbers without evidence.
If a value appears correct but the system continues to reject it, the issue may involve the module’s rules, a mapping problem, or an administrative restriction. Record the message and seek help instead of forcing an unsupported value into the form.
6. UDISE Plus Mismatch Error: How to Correct Incorrect School and Student Records
A udise plus mismatch error occurs when two or more pieces of information do not agree with each other or with the records maintained by the school. The mismatch may involve student enrolment, teacher details, school infrastructure, category-wise totals, or information carried forward from an earlier reporting period.
These errors need careful attention because school data is used for education planning and reporting. The correct solution is to identify the source of the mismatch, verify the original information, and update the relevant field through the authorised process.
Common types of data mismatches
Type of mismatch | Example | What to check |
School identity mismatch | School details do not match the school’s official records | UDISE code, school name, management, and location |
Student enrolment mismatch | Class-wise totals differ from the admission register | Enrolment records and class-wise counts |
Teacher data mismatch | Staff numbers differ from the school’s verified staff records | Teacher records, appointments, and applicable reporting rules |
Infrastructure mismatch | The number of classrooms differs from the school’s facility records | Physical records and the latest verified information |
Category-wise mismatch | Subcategory totals do not match the overall total | Each contributing category and the total |
Previous-year mismatch | Current details differ from earlier submitted information | Confirm whether the change is genuine or requires correction |
Not every difference from the previous year is an error. A school may have enrolled more students, appointed teachers, added facilities, or changed its management status. The aim is to identify whether the difference reflects a genuine change or an incorrect entry.
Step-by-step process to fix a mismatch
Step 1: Identify the exact field. Note the section name, field label, and message displayed by the portal.
Step 2: Compare the information with the original record. For student enrolment, consult the relevant admission and class records. For teacher information, use verified staff records. For infrastructure, check the school’s current facility records.
Step 3: Recalculate totals. If the mismatch involves counts, calculate the total independently before editing the form.
Step 4: Check whether the value is editable. Some fields may be directly editable by the school, while others may be controlled centrally or require approval.
Step 5: Correct the source of the error. Update the incorrect entry only after verifying the information. If the data is correct but the system still shows a mismatch, do not change it simply to pass validation.
Step 6: Save and recheck. Confirm that the corrected value remains in the form and that the mismatch message has disappeared.
Example: A school reports 280 students in its total enrolment field, but the class-wise figures add up to 274. The operator checks each class register and finds that six students were accidentally counted in the wrong class. After verifying the correct figures, the operator updates the relevant entries and runs the validation process again.
This approach is better than changing the overall total without checking the class-wise records.
What if the correct information is still rejected?
If the figures are accurate but the portal continues to report a mismatch, check whether:
- A related section contains outdated information.
- A change needs approval from an authorised official.
- The current module has additional reporting rules.
- The record is locked after submission.
- The problem is caused by an incorrect mapping or a portal-side issue.
Record the error and contact the appropriate Block or District MIS coordinator. If the issue requires a higher-level correction, ask the coordinator to explain the approved procedure.
7. UDISE Plus Rejected Data: Why Submissions May Not Be Accepted
A UDISE plus rejected data message can be confusing because it may appear after a school has spent considerable time completing its information. However, rejection does not always mean that every field is wrong. It may relate to a particular section, a validation rule, an incomplete submission, or a review decision.
The first task is to determine whether the portal has rejected the entire submission or only identified a problem with one part of the record.
Common reasons for rejection
- Required fields have not been completed.
- Totals or related values do not agree.
- Information does not follow the module’s validation rules.
- The submission requires an additional review or approval.
- A section was submitted using outdated or incorrect information.
- The data requires correction by an authorised official.
- A technical failure prevented the submission from being processed correctly.
The exact reasons depend on the module and the status displayed by the portal. A rejected record should be corrected according to the message and the applicable reporting instructions, not by guessing what the system expects.
How to fix rejected data
- Open the relevant status or review section. Check whether the portal provides a rejection reason, remarks, or a list of fields requiring correction.
- Read every remark carefully. A single issue may affect several related fields.
- Compare the rejected information with source records. Verify the original values before making changes.
- Correct only the affected information. Avoid changing unrelated fields that have already been checked.
- Run validation again. Ensure that the corrected section meets the requirements shown by the portal.
- Resubmit through the permitted workflow. Use the available correction or resubmission option if the module provides one.
- Confirm the new status. A successful save does not necessarily mean that the data has been finally accepted or approved.
Example: A school’s submission is returned because the total enrolment figure does not agree with the class-wise figures. The operator checks the admission records, corrects the affected count, and resubmits the information using the available workflow. The operator then checks the submission status rather than assuming that clicking Submit completed the process.
What if the correction option is unavailable?
Some records may become read-only after submission or after an authorised official has reviewed them. If the school cannot edit a rejected section, contact the relevant Block or District MIS coordinator and explain the status shown on the portal.
Do not create another school account or submit a duplicate record to work around the restriction. The appropriate correction route depends on the status of the existing record and the permissions assigned to the account.
8. UDISE Plus Unable to Submit: How to Resolve Submission Failures
A udise plus unable to submit problem occurs when a user completes a form but cannot send it for the next stage of processing. The Submit button may be disabled, the page may show an error, or the system may return the user to the same section without confirming the result.
Submission failures should be treated differently from ordinary saving problems. Saving information may store a draft, while submission may send it for verification, review, or approval.
Check these five things before submitting
- Required sections are complete: Check for blank fields, incomplete sections, and unresolved validation messages.
- Totals and related values agree: Recheck figures that depend on other fields or categories.
- The current session is active: If the session has expired, sign in again and inspect the saved data before continuing.
- The correct submission period is open: Check official instructions for the active academic year and reporting module.
- The account has permission to submit: Some stages may require an authorised user or approval from a higher level.
Step-by-step solution
- Read the message next to the Submit button. If the portal identifies an incomplete section, correct that section first.
- Complete any pending validation. Some systems require a separate validation action before allowing submission.
- Check for an inactive or expired session. If you have been working for a long time, return to the login page and sign in again if necessary.
- Retry only after checking the submission status. If the page appeared to freeze after clicking Submit, first determine whether the request was processed. Repeated clicks can create uncertainty about the current status.
- Confirm the result. Look for a confirmation message, reference number, updated status, or other evidence provided by the module.
Example: A school operator clicks Submit, but the browser continues displaying a loading indicator. Instead of clicking the button repeatedly, the operator waits, checks the current status, and signs in again if needed. If the record has not been submitted, the operator checks the form and retries only after confirming that the session and required fields are correct.
If submission continues to fail, capture the exact error, the affected module, and the approximate time. This information will help the authorised support team investigate the problem.
9. Missing Fields, Duplicate Entries, and Incorrect Records
Not every UDISE Plus problem appears as a technical error. Sometimes the portal works normally, but the school discovers incomplete information, duplicated entries, or incorrect records during data entry or review.
These problems can affect the reliability of the final submission, so they should be addressed before the school completes its reporting process.
Missing information
Missing information may occur because a field was overlooked, a section was not completed, or the person entering data did not have the necessary records available.
How to fix it:
- Review the incomplete section carefully.
- Identify the source record required to complete the field.
- Enter verified information in the format requested.
- Follow the official instructions if the information is unavailable or a field does not apply.
- Save the section and confirm that the missing-field warning has cleared.
Do not enter zero simply because information is missing. A zero may mean that the actual count is none, whereas a blank field may mean that the information has not been supplied. Use the value permitted by the applicable instructions.
Duplicate entries
A duplicate may occur when the same record is entered more than once or when a user attempts to create another record after a slow response.
Before deleting or editing a record, verify that it is genuinely a duplicate. Two students or teachers may have similar names without being the same person.
If the record cannot be edited or removed by the school, request help through the authorised correction process. Avoid creating another account or changing identifying information just to bypass a duplicate warning.
Incorrect school details
If the school name, management type, location, or another identifying field is incorrect, first determine whether the field is editable at school level.
Some information may require administrative verification or a formal correction request. The school should keep supporting documents available and follow the official process for updating the record.
Example: A school notices that its location details do not match its official records. The operator verifies the information against the school’s documents, records the incorrect field, and contacts the appropriate authority if the field is locked. The operator does not create a new school record to replace the existing one.
UDISE Plus Browser Compatibility and Other Technical Issues
A UDISE plus browser compatibility problem may occur when the portal does not work properly in a particular browser, an outdated browser version, or a device with restrictive settings. Some pages may not load, buttons may fail to respond, or a form may display incorrectly.
The official portal has previously advised users experiencing technical errors to check whether their browser is up to date, ensure JavaScript is enabled, clear the browser cache when necessary, and refresh an expired page.
Which browser should schools use?
There is no need to install an unfamiliar browser just to access UDISE Plus. Start with a current, supported version of a mainstream browser, such as Google Chrome, Microsoft Edge, or Mozilla Firefox, and follow any browser requirements published by the relevant portal module.
Useful official resources include:
These are browser download pages, not UDISE Plus troubleshooting services. Download software only from the official publisher.
How to fix browser-related problems
- Update the browser. An older browser may not support all the features used by the portal.
- Refresh the page. If the session has timed out or the page has become unresponsive, return to the login page and start a fresh session.
- Clear cached files if needed. Cached files can sometimes cause pages to behave unexpectedly. Clearing them may help, but it can also sign you out of websites.
- Check JavaScript settings. If a portal function depends on JavaScript, disabling it may prevent buttons and form controls from working.
- Test another browser. If the page works correctly in another supported browser, the original browser’s settings, extensions, or cached files may be involved.
- Check extensions and security restrictions. A browser extension or a school network’s security settings may block a required page function. Follow the school’s IT policy before changing these settings.
- Avoid unnecessary use of the Back button. Some forms depend on an active session. Navigating backwards can return the user to an expired or outdated page.
Example: A teacher can open the UDISE Plus dashboard but cannot use the Save button. The teacher updates the browser, opens a fresh session, and tries again. If the problem remains, the teacher records the exact error and seeks technical help instead of repeatedly changing unrelated settings.
When the issue is not caused by the browser
If the same error appears in multiple updated browsers and on more than one device, the problem may be related to the portal, the network, the account, or the particular module.
In that situation, avoid reinstalling software without a clear reason. Record the problem and report it through the appropriate official channel.
How to Raise a UDISE Plus Grievance or Get Official Support
When ordinary troubleshooting does not work, the next step is to contact the correct support authority. A udise plus grievance should explain the problem clearly and include enough information for the responsible team to investigate it.
The official UDISE Plus reporting page specifically directs school users to Block or District MIS when they forget their credentials or need to update their mobile number or other account details.
Where should you report the problem?
School-level support
Contact the principal, head teacher, or designated UDISE Plus operator to verify the original records, identify the affected section, and confirm whether the error is limited to one account or device.
Block MIS coordinator
Seek assistance for school login credentials, account details, submission status, or problems that need administrative guidance. This is a useful first contact when the portal itself directs school users to the Block MIS.
District or State education authorities
Contact the appropriate District or State MIS team if the problem requires higher-level approval, correction of locked information, or escalation beyond the Block.
Official technical support
If the issue appears to be a portal-side technical failure, use the contact information published on the relevant official portal or the support channel provided by the authorised coordinator.
How to submit a useful complaint
A clear report helps the support team understand what happened and what has already been tried.
Include the following information where appropriate:
- School name and UDISE code.
- Name of the affected module or section.
- Date and approximate time of the error.
- Exact error message, copied accurately.
- A brief explanation of the steps that led to the problem.
- Troubleshooting steps already attempted.
- A screenshot with sensitive information removed or concealed.
- Any reference number or previous complaint details, if available.
Do not include passwords, OTPs, session tokens, or unnecessary student-level personal information in an email or screenshot.
Sample grievance email for UDISE Plus technical support
The following template can be adapted for the authorised Block, District, State, or technical support contact. Use a verified official address rather than an address obtained from an unofficial website.
Dear UDISE Plus Support Team,
I am writing on behalf of our school to request assistance with an issue encountered while using the UDISE Plus portal.
School name: [Enter school name]
UDISE code: [Enter school code]
Affected module: [Enter module or section]
Date and time of issue: [Enter date and approximate time]
Error message: [Enter the exact message displayed]
Description of the issue:
While attempting to [describe the action, such as saving school profile information or submitting a completed section], the portal displayed the above error. We have checked the entered information, verified the relevant school records, and tried the available troubleshooting steps. However, the issue persists.
We request your guidance on resolving the problem and completing the required process within the applicable reporting period.
A screenshot of the error, with sensitive information concealed, is attached for reference, if required.
Please let us know if any additional information or authorised action is needed from our school.
Thank you for your assistance.
Regards,
[Name and designation]
[School name]
[Official contact details]
Dear UDISE Plus Support Team,
I am writing on behalf of our school to request assistance with an issue encountered while using the UDISE Plus portal.
School name: [Enter school name]
UDISE code: [Enter school code]
Affected module: [Enter module or section]
Date and time of issue: [Enter date and approximate time]
Error message: [Enter the exact message displayed]
Description of the issue:
While attempting to [describe the action, such as saving school profile information or submitting a completed section], the portal displayed the above error. We have checked the entered information, verified the relevant school records, and tried the available troubleshooting steps. However, the issue persists.
We request your guidance on resolving the problem and completing the required process within the applicable reporting period.
A screenshot of the error, with sensitive information concealed, is attached for reference, if required.
Please let us know if any additional information or authorised action is needed from our school.
Thank you for your assistance.
Regards,
[Name and designation]
[School name]
[Official contact details]
What if the complaint is not resolved?
Keep a record of the date you contacted support, the authority contacted, any response received, and the next steps advised.
If the issue remains unresolved, follow the published escalation procedure for the relevant State or Union Territory. You may also check whether the official portal provides a current helpdesk or contact page.
Do not assume that a general government grievance portal automatically handles every UDISE Plus technical problem. Use the channel designated for the particular issue and follow its published instructions.
A Practical Troubleshooting Checklist for Schools
Schools can prevent many avoidable errors by following a consistent process before, during, and after data entry. The checklist below can be used by a school operator or principal when reviewing an error.
School error-prevention checklist
Before starting
- Open the correct official portal and reporting module.
- Keep verified school records and required figures ready.
- Confirm that the browser and internet connection are working.
- Check the applicable academic year and reporting instructions.
While entering information
- Enter values from verified records rather than estimates.
- Complete required fields and check related totals.
- Save sections when the portal provides that option.
- Check for validation messages before moving to another section.
Before submitting
- Review the entries against source records.
- Resolve missing-field and mismatch messages.
- Confirm that the current session is active.
- Check whether all required sections are complete.
After submitting
- Look for a confirmation message or updated status.
- Reopen the relevant section to verify saved values, where appropriate.
- Keep a copy of the permitted final report or confirmation.
- Record unresolved errors and contact the authorised support team.
A simple example of an effective school workflow
Suppose a school needs to submit its annual data but encounters an error in the teacher section.
Instead of asking several staff members to make changes independently, the school should assign one authorised operator to investigate the issue. The operator checks the relevant staff records, reviews the validation message, and confirms whether the field is editable. If the information is correct but the portal still rejects it, the operator records the error and contacts the appropriate MIS coordinator.
Once the issue is resolved, the school verifies the saved data and confirms the submission status. This process creates a clear record of what happened and reduces the risk of duplicate entries or conflicting changes.
Official References and Useful Resources
The following links are useful for verifying information, accessing the correct module, and finding official publications. They are preferable to relying on old screenshots, unofficial tutorials, or unverified social media instructions.
1. UDISE Plus official portal
Main access point for school information, reporting services, and official announcements.
2. Ministry of Education: UDISE Plus statistics
Published school education statistics, reports, and academic-year information.
View statistics and publications

3. UDISE Plus reporting module
Reporting login and guidance on contacting Block or District MIS for school credentials.
5. UDISE Plus GIS Capture Portal
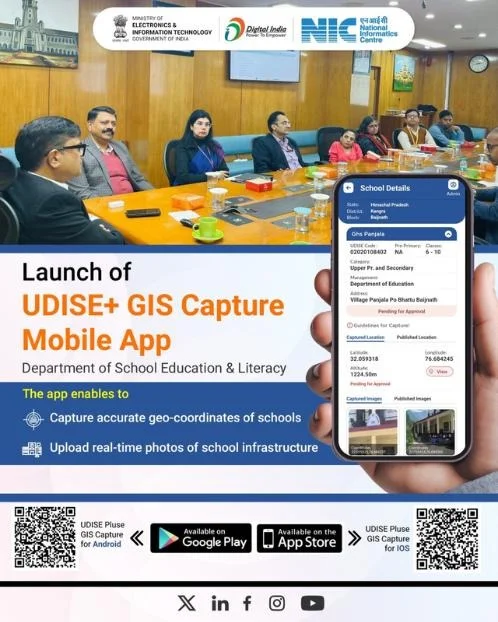
Dedicated service for GIS-related school location information and associated capture workflows.
6. UDISE Plus Data Capture Format
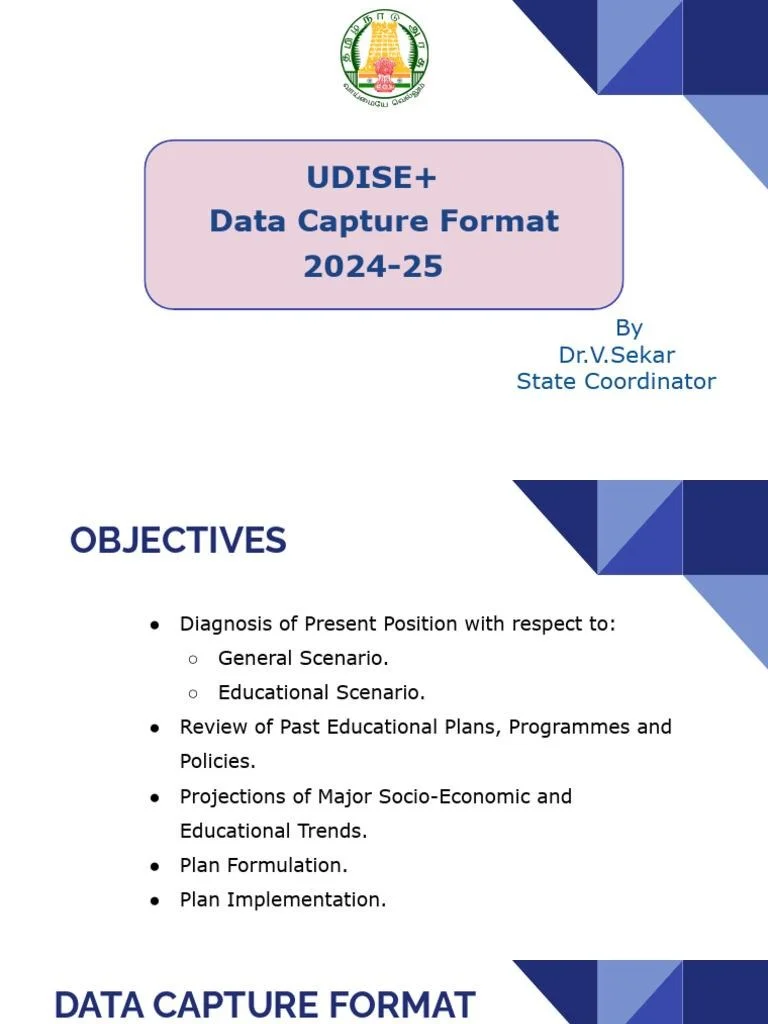
Use the Ministry’s official page to find available DCF proformas and reporting documents.
These resources serve different purposes. A reporting login page is not necessarily a technical helpdesk, and a published report may not contain instructions for correcting a live school record. For account-specific problems, follow the contact instructions displayed by the relevant module.
Conclusion: Fix UDISE Plus Errors by Following a Clear Process
UDISE Plus errors can interrupt school reporting, delay submissions, and create unnecessary work for teachers and administrative staff. However, most problems become easier to manage when the user identifies the exact error, checks the original records, follows the correct troubleshooting steps, and verifies the result before moving forward.
For technical problems, start by checking the internet connection, browser, login session, and portal status. For data-related problems, review the source records, required fields, totals, and validation messages. If a submission is rejected or a field cannot be edited, contact the appropriate Block or District MIS coordinator rather than making unsupported changes.
Remember that saving data and submitting data are not always the same thing. Always check the status displayed by the portal and retain any permitted confirmation or final report.
A reliable school reporting process depends on three things: accurate information, careful verification, and timely support. By following the steps in this guide, schools can reduce avoidable errors, protect the quality of their records, and complete their UDISE Plus reporting with greater confidence.
The most important rule is simple: never change a correct school record just to remove an error message. Verify the information, understand the validation rule, and seek authorised help whenever the problem requires an administrative or technical correction.
FAQs
1. Why is UDISE Plus not opening today?
The portal may be temporarily unavailable because of maintenance, heavy traffic, a network problem, or a browser issue. Check your internet connection, open the official website, and try again after a short wait. If the problem continues across devices and networks, contact the authorised support channel.
2. What should I do if UDISE Plus data is not saving?
First, check whether the portal displayed a success message. Review required fields and validation errors, then reopen the section to verify whether the information was stored. If the data is missing, enter the verified information again and save it carefully. Avoid repeatedly submitting the same form without checking its current status.
3. How can I reset my UDISE Plus password?
Open the correct official login page and use its password-reset facility if one is available for your account. If the facility does not work or the account requires administrative assistance, contact the Block or District MIS coordinator. The official reporting page identifies these coordinators as the contact for school users who have forgotten credentials or need to update account details.
4. Why does UDISE Plus show a session-expired message?
The session may have expired after a period of inactivity, or the page may be using an outdated session. Sign in again through the official portal and check which information was saved. If the error occurs repeatedly, update your browser, clear cached files if necessary, and try a fresh session.
5. What causes a UDISE Plus validation error?
A validation error may result from a missing field, an incorrect number or date format, an inconsistent total, or a value that does not meet the module’s rules. Read the complete message and compare the affected field with the original school record. If the value is correct but the error remains, seek assistance rather than entering an unsupported value.
6. What should I do if UDISE Plus rejects my submission?
Read the rejection reason or review remarks provided by the portal. Correct the identified fields using verified information, run validation again, and resubmit through the permitted workflow. If the record is locked or no correction option is available, contact the relevant MIS coordinator.
7. Can I change submitted UDISE Plus data myself?
That depends on the module, the submission status, and the permissions assigned to your account. Some information may be editable before submission, while other fields may require an authorised correction or approval. Always follow the official procedure for the affected field.
8. How can I check whether my school has the correct UDISE code?
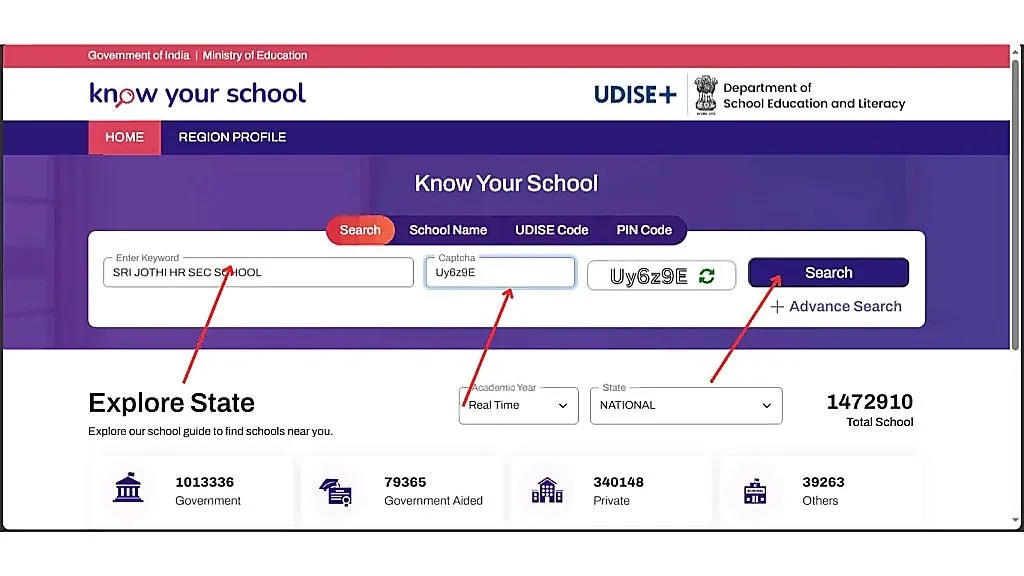
Use the official Know Your School service to look up school information. Check the school name and location carefully. If the code or school details appear incorrect, contact the appropriate education authority for verification and correction.
9. What should I do if the Submit button is not working?
Check whether the required fields are complete, validation errors have been cleared, the session is active, and your account has permission to submit. If the page appears frozen, wait and check the submission status before trying again. If the problem persists, record the error and seek technical support.
10. Does UDISE Plus have an official mobile app for every reporting task?
Not necessarily. Different UDISE Plus services may have separate web portals or dedicated applications for specific purposes. For example, the official UDISE Plus GIS Capture Portal provides access to a dedicated GIS capture application. Check the relevant official portal for the application required for your task, and avoid unofficial downloads.
11. What should I include when reporting a technical problem?
Include the school name, UDISE code, affected module, date and approximate time, exact error message, and troubleshooting steps already attempted. Add a screenshot only if it can be shared securely. Never include passwords, OTPs, or unnecessary personal information about students or staff.
12. Where can I find official UDISE Plus instructions and reports?
Start with the UDISE Plus homepage, which links to its services and reporting resources. For published statistics and reports, use the Ministry of Education’s UDISE Plus statistics page. Always check the relevant academic year because forms, reporting periods, and instructions may change.

Hey, I am Sachin Ramdurg. I run and manage futuredecider.com website that helps students, graduates, and professionals, to find and decide on their future career with ultimate future career advices and future career guides. I have an overall 12+ years of career guidance experience in multiple domains which has helped multiple students, graduates, and professionals to find the best career path for their future.